
Have you ever, intending to let the water flow, turned the handle of your faucet and finally got into a struggle with it? It is pretty annoying, isn’t it? A non-cooperative handle can extend your day, and you will keep wondering what happened. You might even experience not wanting to use the faucet because of your fear that something is going to break. But the good news is, you are not hopeless. With the proper procedure and a slight understanding, you will be able to revive the difficult faucet handle without the need of a plumber.
We will cover in this guide the reasons why your faucet handle gets stuck, the measures to take, and the proper way to fix it, in a very simple, amicable, and easily understood manner. Consider this as your personal repair consultation, right in your home.
1. Why Your Faucet is So Hard to Turn?
A hardened faucet handle usually results as a result of accumulation in the tap, as highlighted by expert plumbers. Hard water mineral deposits may accumulate around the cartridge making it hard to move. The handle is also dirty with a lot of grime and old grease, which produces friction and you have to twist harder than normal. In other cases, it is the tired washers or the rubber O-rings which have become inelastic.
These broken parts cause hindrance to the smooth rotation and create resistance. Knowing what is in the house makes you know what should be cleaned or what should be adjusted or changed before you start doing the fix.
2. Turn Off the Water First
One should always turn off his or her water supply before performing any action to prevent unnecessary leaks in the plumbing system.
You should find two little valves under your sink and turn them off by turning them clockwise until they are off. In the event that you do not have individual valves you will have to turn off the main line at least. This measure makes sure that you will not experience sudden sprays and flooding during work.
Once the valves are closed, switch the faucet on to get rid of the water remaining behind. With a clean and a clean environment, the repair process becomes very easy and your surrounding is not exposed to the damage caused by water.
3. Before Inspection, remove the Handle
When the water is turned off, begin opening the faucet so as to access the parts. The majority of the handles contain a concealed screw behind the lever or under a cover. As soon as you take off the handle, one should slide off. In case it is stuck, move it carefully till it becomes loose. When you remove the handle, then you have an easy access to the cartridge or stem, that is where stiffness usually starts.
Check to see whether there is any corrosion, mineral deposition or dirt. This check up will enable you to determine whether it is a quick cleaning or a complex repair.
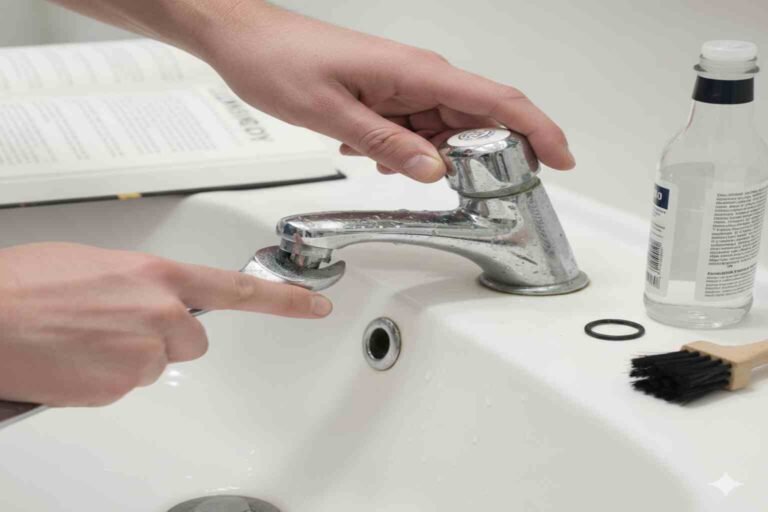
4. Clean the Cartridge or Stem
When it is empty, you should clean the cartridge or stem with the handle taken away. These parts are frequently encircled in a crusty layer which makes them hard to move due to mineral deposits. To loosen the tough deposits swipe the cartridge in vinegar a few minutes. In case it cannot be removed, wipe it off with a toothbrush which has been dipped in vinegar. Any metal tools must be avoided as they may scratch the surface. Regular maintenance like this also helps keep floor drains fresh.
The coarseness and friction resulting in stiffness are removed by cleaning. Once scrubbed wipe the parts off and put a little plumbers grease on to ensure that everything moves easily once more.
5. Washers or O-Rings Should be Replaced
Worn washers or O-rings could be the source of the resistance in case cleaning does not give a solution to the issue. Such little rubber bits wear out naturally and become un-stretchy with time. Examine them carefully as to cracks, flattening or brittle. They are also cheap and fast to replace and in many cases, they lube immediately. All one has to do is to take out the old ones and put the same new ones in.
New washers and O-rings facilitate the movement of the faucet and lessen inner friction. The numerous problems with the stiff-handles can be resolved easily by fitting these little replacements.
6. Put Everything Back and Test
After everything and all replacements have been made, then it is time to reassemble the faucet. Place the handle back onto the stem or cartridge, screw the handle firmly and put the decorative cap in place again. Slowly open the water valves to restore pressure. Examine the handle by turning it about a few times. When it again moves freely, then your repair was completed successfully.
In case of stiffness, there is a possibility that the cartridge could be worn out and would require complete replacement as per professional staff. Fortunately, it is still an easy task to replace in case of necessity.
Conclusion
A hard faucet handle may seem a minor inconvenience, but it should be repaired before it causes a greater problem. Having a simplified knowledge of the problem and a couple of easy measures will enable you to clean, replace or mend the parts, which give the problem of stiffness. Simple care, such as cleaning up mineral deposits and greasing the handle, helps to ensure that your faucet has a smooth running life of many years. And once the handle does not give in regardless of what has been done, changing the cartridge will practically always rectify the matter. You are now in a position to act and have a faucet that turns easily once again.
